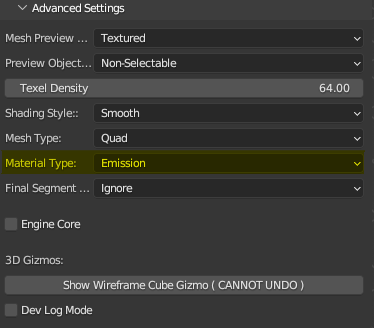
Advanced Settings
Retro3D Toolkit: Advanced Settings Guide
Welcome to the Advanced Settings panel of the Retro3D Toolkit, a comprehensive tool designed for artists and developers eager to infuse their Blender projects with the charm and style of retro 3D graphics. This panel is your command center for fine-tuning the visual characteristics of your 3D models, ensuring your creations not only evoke the nostalgia of vintage games and graphics but are also optimized for your current project's needs, and in a lot of cases "modernizing" this avenue of expression while remaining true to its origin. These options are not typically changed often, but are vitally important as they shape the entire art trajectory of the project being developed.
Understanding the Advanced Settings Panel
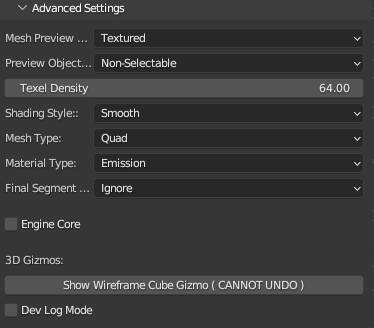
The Retro3D Advanced Settings Panel is part of the broader RETRO3D toolkit within Blender, accessible in the 3D Viewport's UI sidebar under the 'RETRO3D' category. It's nested under the main Retro3D settings, providing additional parameters that enable you to customize your project's aesthetics and performance more deeply.
Texel Density
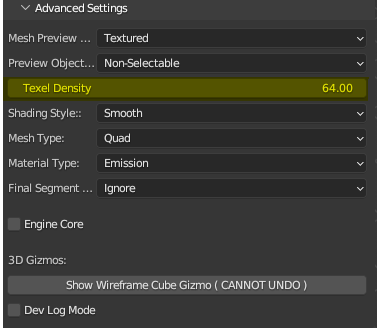
Texel Density controls the texture detail across different scales of your models. Adjusting this setting allows you to manage how textures are stretched or compressed over the surface, crucial for achieving the perfect balance between retro aesthetic and clarity.
Why It's Important: Consistent texel density ensures your models look uniform, preventing some parts from appearing blurrier or more detailed than others—a common pitfall in retro 3D design.
Allows user to build in "Texel Space": We have carefully interwoven the texel density algorithm in addition to common control parameters to help guide the model being created to be set up for as painless of a UV unwrap as possible. By building to scale, you are thinking ( by merit of the methodologies employed during the creation process) and involving the UV Map each step of the way. This helps alleviate the at times backward approach of trying to "Cram" a non pixel scale model's UV Map into a "Pixel Perfect" space near the end of the modelling phase, this at the very lest greatly moves this along to a manageable form for hand painted artist or simulations of such by other smart materials. This circumvents most, not all of those production pains when you eventually have to UV Unwrap.
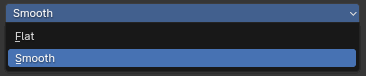
Shading Style
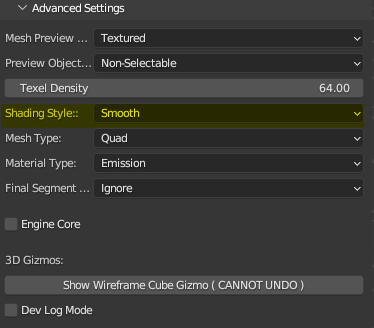
Shading Style lets you choose how your models are shaded, offering styles that mimic various retro 3D aesthetics, from flat shading to more complex, simulated lighting techniques.
These are the drop down menu options for Shading Style. You can access these options by simply clicking on the drop down menu to expand the options and choosing the one you require.
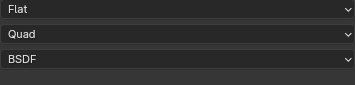
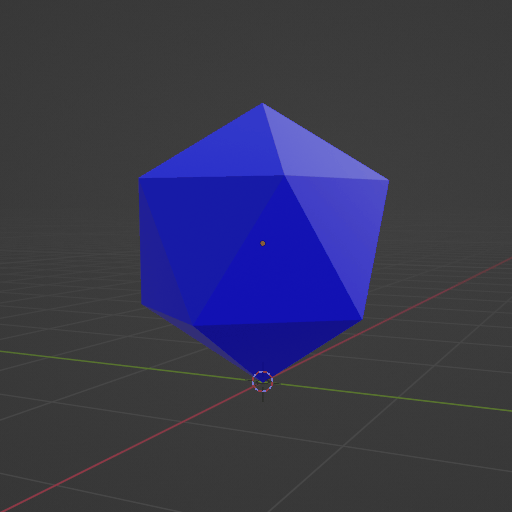
Here is an example of Flat Shading. Pay attention to hard edges provided by the edges of the model.
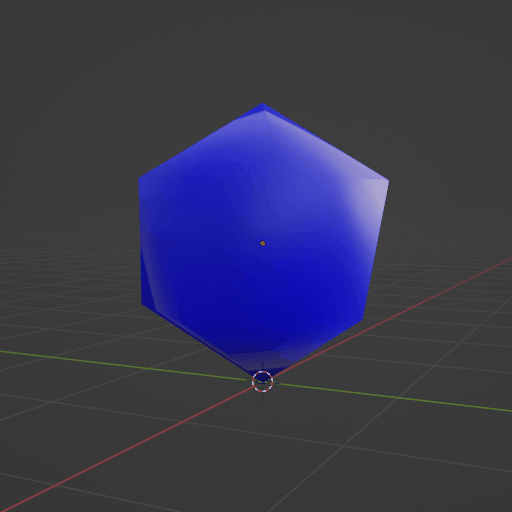
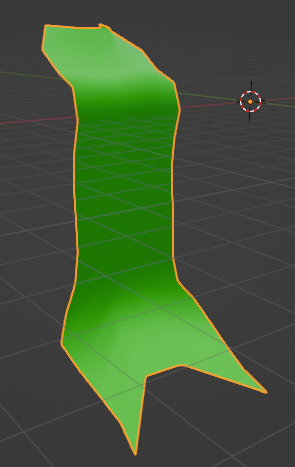
Here is an example of Smooth Shading. Pay attention to smoothness of the edges.
Why It's Important: Shading dramatically affects the perception of form and material in 3D models. Selecting the right style can transport your audience back in time or give your project a distinct look. Going over the intricacies of the differences of shading styles far exceeds the scope of this tutorial. However it is important to understand what these settings do and how they effect the default generated models.
Mesh Type "Geometry Core"
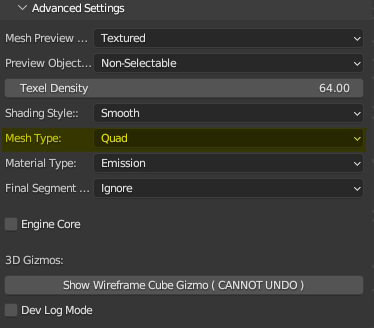
In the realm of 3D modeling and rendering, Mesh Type plays a crucial role in defining how the shapes and surfaces of your models are constructed and visualized. Within the Retro3D Toolkit, you have the option to choose between two primary types of mesh geometry: QUAD and TRIANGLE. Each has its unique characteristics and implications for your project, especially when aiming for a retro aesthetic.
QUAD Meshes
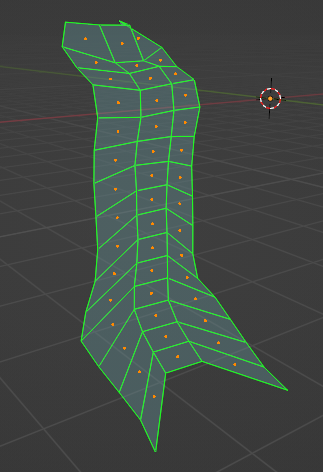
- Description: QUAD meshes are composed of four-sided polygons. They are often favored in modeling processes due to their mathematical simplicity and how closely they mimic the way natural and manufactured objects appear in the real world.
- Benefits: For artists, QUADs are easier to work with when sculpting, texturing, or applying modifications, as they offer a more intuitive control over the flow of geometry. They can be particularly advantageous in creating organic shapes or when subdividing surfaces for more detail.
- Retro Relevance: In the context of retro 3D visuals, QUADs can be used to efficiently mimic the look of older graphics, where the simplicity and blockiness of shapes were more pronounced due to the technical limitations of the time.
TRIANGLE Meshes
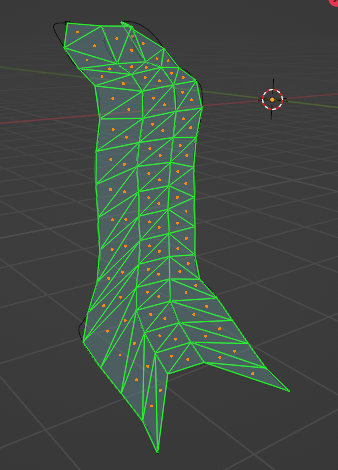
- Description: TRIANGLE meshes, as the name suggests, are made up of three-sided polygons. They are the most basic form of 3D geometry and the fundamental building block for all 3D shapes and models in computer graphics.
- Benefits: TRIANGLEs are universally compatible across all 3D rendering and game engines, making them ideal for wide compatibility. They often result in faster rendering times because they simplify the calculation process for rendering engines.
- Retro Relevance: Triangles are particularly significant for creating retro 3D visuals because early 3D games and graphics were largely reliant on TRIANGLE-based geometry. This was due to both the limitations of hardware at the time and the necessity for efficiency in rendering.
Why It's Important
The choice between QUAD and TRIANGLE mesh types is more than just a technical decision; it's a creative one that directly influences the aesthetic and performance of your project.
- Visual Style: QUADs can offer a smoother, more refined look, suitable for high-detail or more realistic models ( not recommended to use this for hyper realism), while TRIANGLES can help achieve the sharp, angular appearance characteristic of many retro styles.
- Performance: TRIANGLE meshes often render faster, making them a wise choice for performance-critical applications like real-time game engines. QUAD meshes, however, might be preferable in pre-rendered content or where the workflow benefits outweigh performance considerations.
Ultimately, selecting the right mesh type can help ensure your project not only captures the essence of retro 3D visuals but does so efficiently and effectively, aligning with both your aesthetic vision and performance needs.
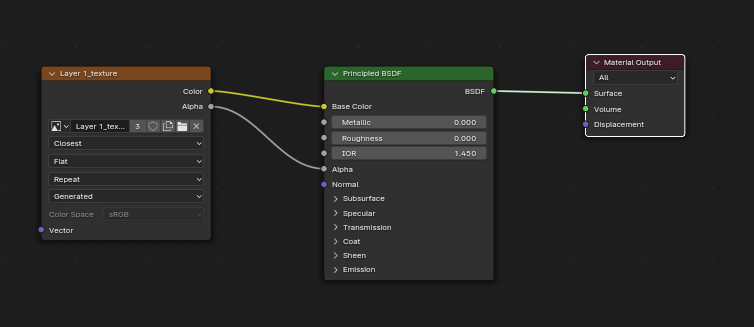
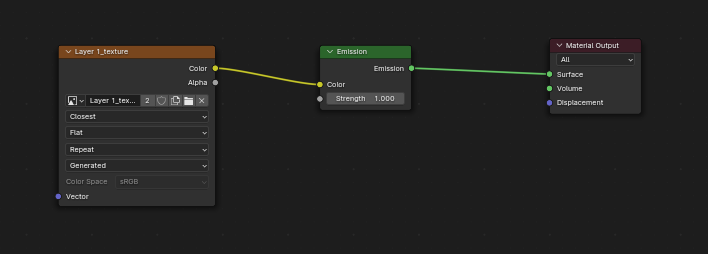
Material Type (PrototypeMaterial)
The Material Type setting is a pivotal feature in the Retro3D Toolkit, enabling you to meticulously control the appearance of surfaces within your Blender projects. By selecting from options like "BSDF", "EMISSION", and "RETRO3D", you can tailor materials to reflect the unique graphical traits of various eras of historical hardware, each with its own distinct rendering philosophy.
Options Explained:
-
BSDF (Bidirectional Scattering Distribution Function): This option leverages physically based rendering (PBR) principles to create materials that interact with light in a realistic manner. BSDF is ideal for when you want parts of your retro project to maintain a touch of modern realism, especially for scenes where accurate light interaction is crucial.
-
EMISSION: Emission materials emit light rather than just reflecting it. This choice is perfect for creating glowing effects or simulating the light-emitting surfaces common in older video game graphics, where certain textures or objects need to stand out with their own light source.
-
RETRO3D: A custom, emission-based layer material unique to the Retro3D Toolkit. Designed specifically for texture painting, the RETRO3D material eschews PBR in favor of a stylized, nostalgia-inducing appearance. This material is key for artists aiming to replicate the look of games from a bygone era, offering a simplified but highly effective way to achieve that iconic retro aesthetic. It's particularly suited for projects that prioritize artistic expression over photorealism ( that is not to say that photorealism itself isn't an artistic expression in its own right), embodying the visual essence of vintage hardware limitations. For example the control aspects of the mesh generation techniques in combination with the quantization of the model being built in "Texel Space" allows us to open up and explore what used to be technically unviable by directing the shader to focus its effects on a per pixel basis.
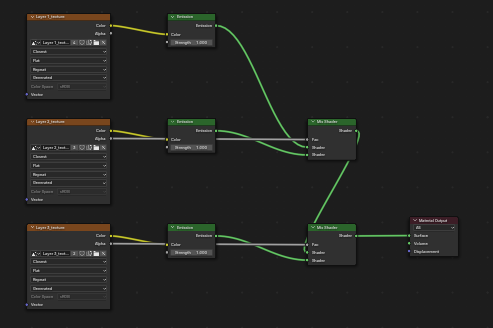
Here is an example object using our Retro3D Material
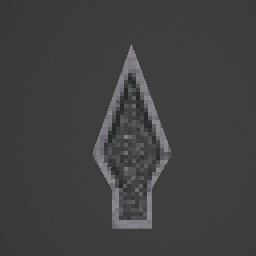
This is how we spearhead progress.
Why It's Important:
Materials are the essence of visual storytelling in 3D design, imbuing your scenes with life, depth, and emotion. In the context of retro-inspired projects, or a certain type of low poly stylized visuals, choosing the appropriate material type can dramatically amplify the authenticity and immersion of the experience. It's not just about the colors or textures; it's about how these surfaces interact with the virtual world's light and shadows, echoing the graphical constraints and creative ingenuity of past generations.
In Short:
-
BSDF materials can bridge the gap between past and present, offering a blend of nostalgia and realism that can make certain elements pop with a contemporary flair.
-
EMISSION materials are your go-to for mimicking the self-illuminating textures seen in many classic games, essential for recreating scenes with a vibrant, dynamic energy.
-
The RETRO3D material, with its unique emission-based properties, allows for broad creative exploration within the retro theme, enabling texture painting that resonates with the simplicity and charm of early 3D graphics. This material specifically addresses the need for non-PBR texturing within retro projects, ensuring that artists can achieve desired aesthetics without the complexities of modern material systems.
By understanding and utilizing these material types, you unlock the potential to craft visually captivating scenes that pay homage to the digital artistry of the past while leveraging the advanced capabilities of contemporary 3D modeling and rendering software.
Final Segment Loop Option
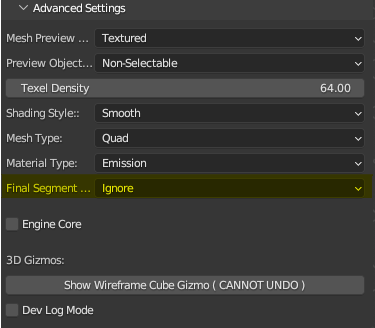

- INTERPOLATE When this is selected, the last curve in the selected curves and the first curve in the selected curves will be included in the mesh generation process. This is primarily useful for creating meshes that have a closed bezier curve as its base starting point, and many other use cases.
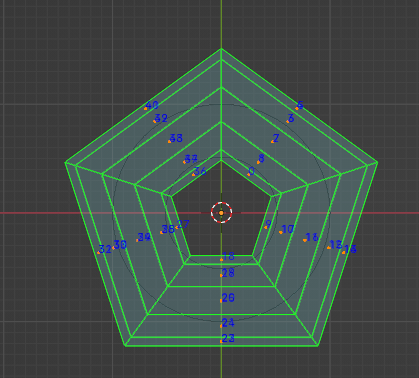
- IGNORE When this is selected, the last curve in the selected curves and the first curve in the selected curves will be ignored. This is most likely the most common use case but it really depends on the pipeline and workflow of the creatives involved.

Engine Core
- Description: A hybrid box modeling workflow that utilizes curves with an equal number of control points to generate mesh geometry. The control point data itself becomes the vertex positions during the mesh generation process, while still respecting the spatial distribution of interpolation points between curves. Vertices per curve becomes irrelevant with this enabled but can later be used when Engine Core is disabled.
- Requirements: All curves used with Engine Core must have the exact same number of control points. This is crucial for the proper generation of the mesh geometry.
- Behavior: When enabled, Engine Core ignores the "Verts Per Curve" setting and instead uses the control points of the curves directly as the vertex positions for the generated mesh. This allows for a unique modeling approach that combines the benefits of curve-based modeling with the precision of box modeling.
- Usage: Enable Engine Core when you want to have direct control over the vertex positions of your mesh using the control points of your curves. This is particularly useful for creating precise, geometric shapes or for retaining the tangent curve data of your designs.
- Workflow: To use Engine Core effectively, start by creating a set of curves with the same number of control points. Arrange the control points to define the desired shape of your mesh. The control points will be used as the vertex positions, while the interpolation points between the curves will be used to determine the spatial distribution of the mesh geometry.
Tip
Engine Core is a powerful tool for creating complex, precise meshes using curves. By having direct control over the vertex positions through the control points, you can achieve results that are difficult or time-consuming to achieve with traditional box modeling techniques. Experiment with different curve layouts and control point configurations to unlock new possibilities in your modeling workflow.
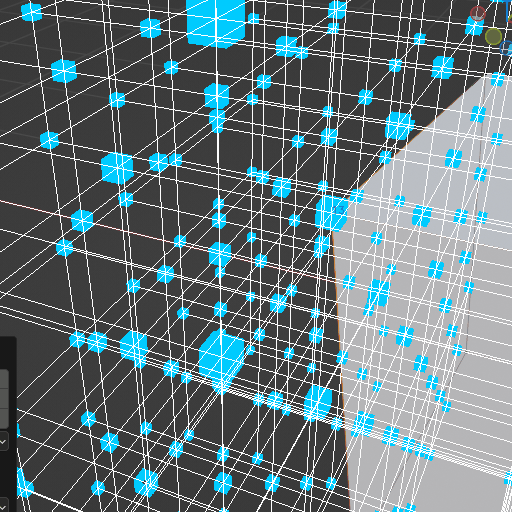
3D Gizmos: Wireframe Cube Gizmo
The panel includes a unique tool to visualize your models "snapping points" in a wireframe cube, reminiscent of early 3D modeling and debugging techniques. This gizmo offers a practical way to inspect the basic form and structure of objects without the distraction of textures or shading. This is purely for educational purposes and visualizations for aspects of this pipeline that can help beginners understand the "vertex" snapping aspect of the render pipelines commonly used.
Why It's Important: It provides an essential tool for analyzing and adjusting the fundamental geometry of your models, ensuring they align with your project's aesthetic goals.
-
Note: This cannot be undone as it draws directly from the GPU and there is no way to manage this data. Saving and loading a project should reload everything as before minus this effect should you find yourself accidentally in a session with this activated.
-
Dev Log Mode
Toggle this to enable or disable developer logs. Not fully implemented yet.
Why It's Important: Keeping a log of technical details can drastically reduce the time spent on identifying issues or optimizing your workflow, especially in complex projects aiming for a retro aesthetic. Being able to understand the core issue allows us to provide better support.
Conclusion
The Advanced Settings Panel in the Retro3D Toolkit equips you with the tools and controls necessary to refine your Blender projects to perfection, capturing the essence of retro 3D visuals while optimizing performance. By understanding and utilizing these settings, you can effectively save time and create more engaging, nostalgic, and visually coherent projects that resonate with your audience.